Showing posts with label Ideate Inc. Show all posts

July 18, 2016

Revit 2017: Simplify Models with Revit Parts

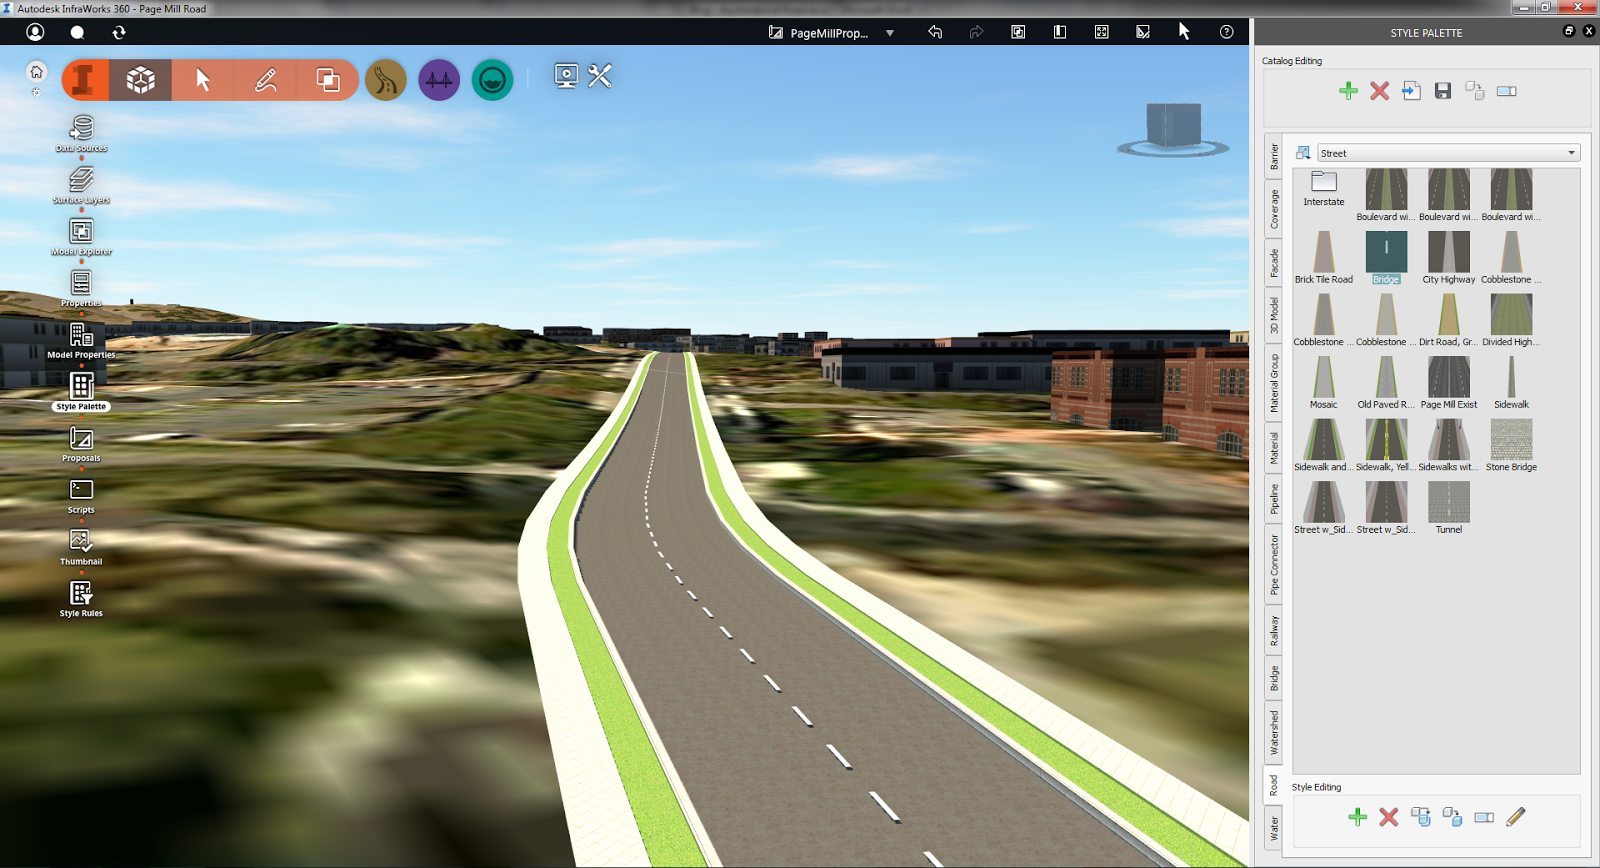
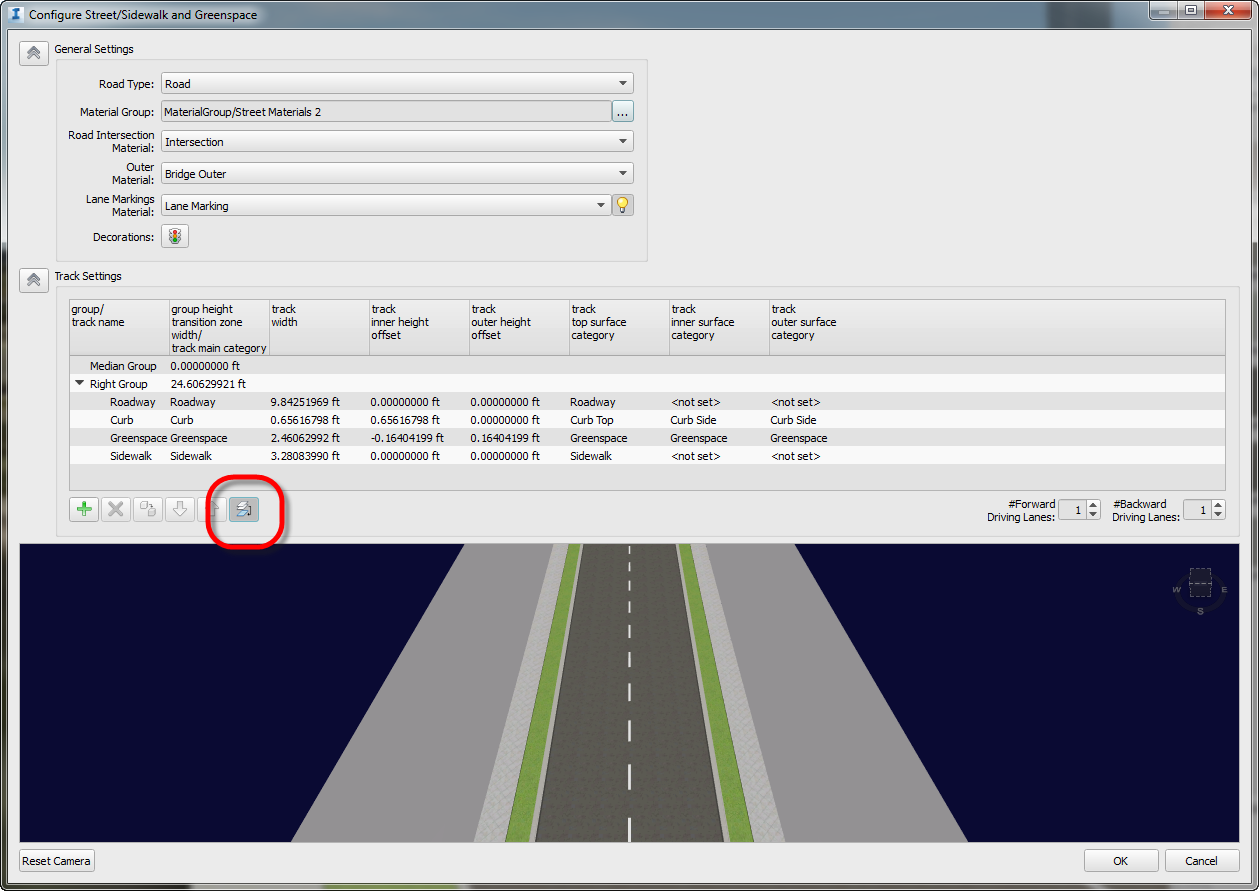
I am excited to share a new workflow with you Ideate developed when a valued customer asked the following:

"What is the best workflow if I am creating a shear wall with furring on each side and need to be able to demolish the furring portion, sometimes just on one side? In addition, I want to control the height of each furring wall separately from the core.

Is my only option to create three walls? This gives me what I want to see, 
graphically and I can adjust the height of each wall independently, but now I have to manage three walls, which can be tedious and time consuming."
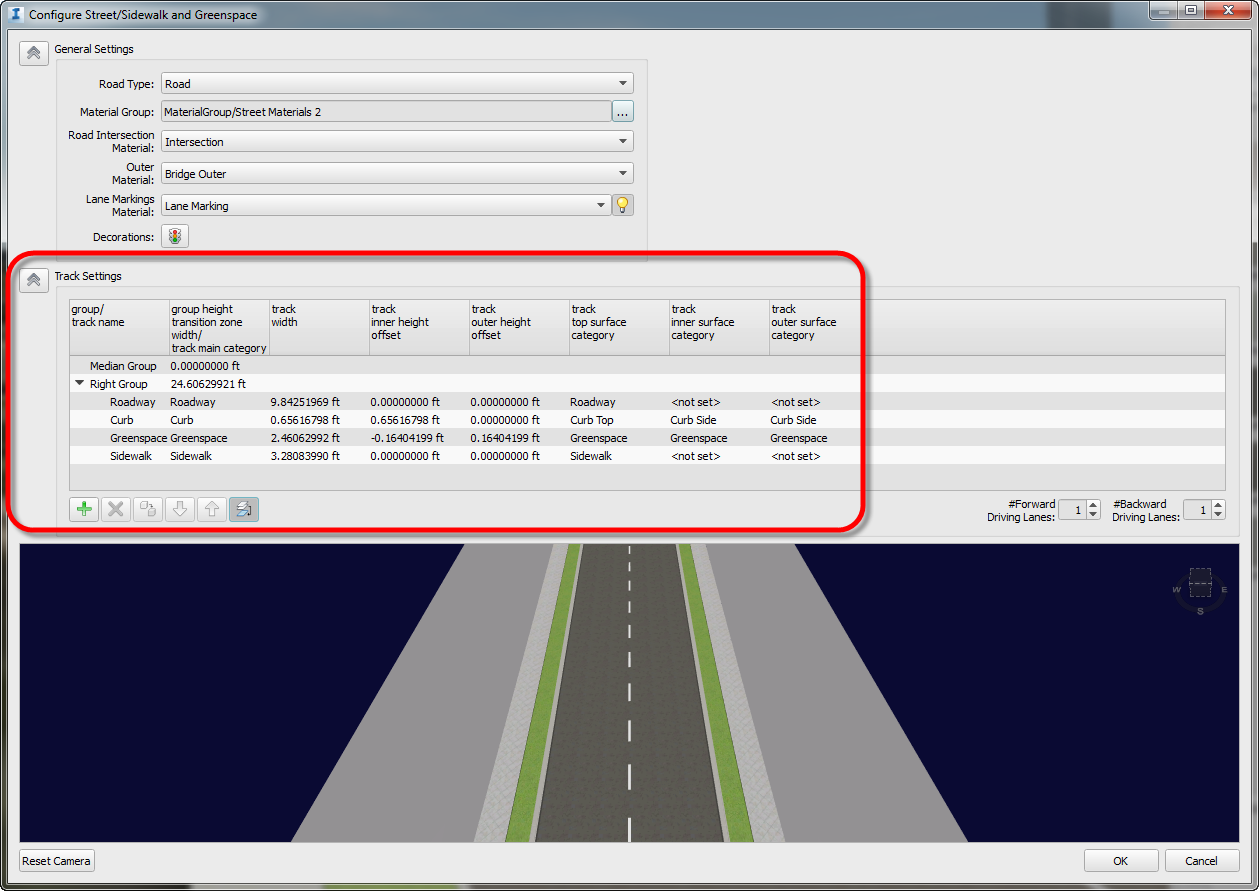
After pondering what the customer was trying to achieve, the first thing that came to my mind was “Revit Parts!"

In my opinion, Parts is an underutilized tool that can provide you more flexibility with all of the different pieces of your system family assemblies.

To dive into this new workflow, checkout my short video on how to turn your wall assembly into Parts, allowing you to demolish portions of the wall and control the height of each furring wall individually.

Thank you for reading! For more information on Revit and other Autodesk products, and information on training and consulting for the various products Ideate services, please visit our website.


AEC Application Specialist
Emily Clark holds a Bachelor of Architecture degree from Kansas State University, and has over 19 years of experience in the Architecture industry. Her experience includes working for a number of Architecture and Design/ Build firms in the Western United States. She has been a Project Designer, Intern Architect, BIM Manager and Design Technology Manager. She has contributed to the completion of projects ranging from high–end custom residential to Education and Healthcare design. She has worked with multiple platforms and her passion for BIM has enabled her to help transition firms and advance with technology. At Ideate, Emily provides training and support for Revit Architecture.

June 20, 2016

Classroom Training - Open Navisworks, Revit and AutoCAD and Classes

Know It. Ideate Training.

Position yourself to land dream projects. Tap the full potential of your software solutions. Increase your facility, fluidity and capability to maximize the value of your precision software tools.
7.6-7.7::San Francisco
Navisworks Fundamentals
7.12-7.14::San Jose
Revit Architecture Fundamentals
7.12-7.14::San Francisco
Revit Structure Fundamentals
7.18-7.20::San Francisco
Civil 3D Fundamentals
7.19-7.21::Sacramento
AutoCAD Fundamentals
7.19-7.21::Portland
Revit Architecture Fundamentals
7.26-7.27::San Jose
Civil 3D for Surveyors
Know your software. Sign up now! 

Contact the Ideate Training Department at 888.662.7238 x1012 or education@ideateinc.com

March 14, 2016

e-Learning - Upcoming Infrastructure, Revit, and Ideate Software Classes

Join the Ideate Tech Experts for eLearning – live online classes that provide your entire organization with easy access to premium education.
3.22:Revit 201:
Phasing A-Z
3.23::Ideate Software:
Revit Model Management with
Ideate BIMLink
3.24::Ideate Software:
Auditing Your Revit Project with Ideate Explorer
3.25::Infrastructure 201:
Intersection Design Tool
3.29::Revit 201:
Getting Started with Roof Framing in Revit Structure
4.1::Revit 201:
Revit MEP and Low Voltage Systems

4.7::Ideate Software:
Introduction to
Ideate Sticky
4.13::Ideate Software:
Auditing Your Revit Project with Ideate Explorer
Each class is designed to give you specific, improved results in a particular topic. You can interact with the instructor right from your own office, while eliminating travel time. Because the class schedule rotates, you can easily select your topics of interest and choose the day which best meets your schedule.

Click here for class descriptions, times and registration link. Questions? Contact education@ideateinc.com

Get It. Know It. Use It.

January 5, 2016

May The “Force” Be With You…..

 
Schedule without forcing a hard return

Have you ever wanted to force line breaks into your schedules views, or even perhaps into your view titles?

While in a schedule you can force the line break using Ctrl+Enter
 

Here is an example of the schedule before adding in the hard returns:


Schedule before forcing a hard return

Schedule View after adding the hard returns:


Schedule after forcing a hard return

The end result of the schedule on the sheet:


Schedule on Sheet

A similar trick can be used in view titles that do not wrap the way you desire. Utilizing the Title on Sheet field, instead of the View Name field you can Ctrl+Enter your title as noted below.

Cheers to new beginnings and new endings, thanks to the Ctrl+Enter keys!
 
For more information on training and consulting for the various products Ideate services, visit our website at
www.ideateinc.com


Emily Clark

AEC Application Specialist

Emily Clark holds a Bachelor of Architecture degree from Kansas State University, and has over 19 years of experience in the Architecture industry. Her experience includes working for a number of Architecture and Design/ Build firms in the Western United States. She has been a Project Designer, Intern Architect, BIM Manager and Design Technology Manager. She has contributed to the completion of projects ranging from high–end custom residential to Education and Healthcare design. She has worked with multiple platforms and her passion for BIM has enabled her to help transition firms and advance with technology. At Ideate, Emily provides training and support for Revit Architecture.

January 4, 2016

e-Learning - Upcoming Revit, Civil 3D and Ideate Software Classes

Join the Ideate Tech Experts for eLearning – live online classes that provide your entire organization with easy access to premium education.
1.5::Ideate 101:
Network License Manager 
1.8::Revit 201:
Worksharing Best Practices
1.13::Ideate Software:
Auditing Your Revit Project with Ideate Explorer
1.20::Ideate Software:
Introduction to Ideate Sticky 
1.21::Revit 201:
Rapid Detailing
Each class is designed to give you specific, improved results in a particular topic. You can interact with the instructor right from your own office, while eliminating travel time. Because the class schedule rotates, you can easily select your topics of interest and choose the day which best meets your schedule.

Click here for class descriptions, times and registration link. Questions? Contact education@ideateinc.com

Get It. Know It. Use It.

December 15, 2015

Going from 2D to 3D Using Infraworks 360 and Autodesk AutoCAD Civil 3D with Raster Design

Have you ever thought about the difference a 3D model would make when compared to a 2D sketch or plan?  Using Autodesk AutoCAD Civil 3D and Infraworks 360 can take you from 2D to 3D in a matter of minutes, and it’s probably much easier than you think.

Recently, while researching a project for one of our customers, I came across a 2D proposed site plan on the internet and wanted to show that in 3D context using Infraworks 360.


Basically, I wanted to turn this:
  

into this:      


Although it seemed like an easy option, considering images can be used as an Infraworks data source, it did not go as smoothly as planned.  Because Infraworks 360 is a geographic coordinate driven database, data sources need some type of location data in order to understand where they belong in a model.  With most standard images, these coordinate files are not provided.

My first step was determining an accurate position for the standard non-coordinate based image.  The second step was then creating the coordinate file for the image that provided Infraworks 360 with the data it needed to use the image in my model.  I also wanted to use tools that were readily available in my current Autodesk products rather than going to an outside source to generate any additional data.

After a little bit of thinking, I realized that the combination of Autodesk AutoCAD Civil 3D, along with Raster Design and the new Geolocation feature would provide me with everything I needed to geolocate the image and generate a supplemental world (.TFW) file for the TIFF (.TIF) image that I wanted to use.  Once I had the world (.TFW) file, the image had all of the data it needed to be a valid Infraworks 360 data source.  This also works for JPEG (.JPG) files by generating the accompanying world (.JPW) file.

The project started out with a small planned development in the corner of two intersecting streets.  Locating and generating a preliminary model took about five minutes using Infraworks 360’s Model Builder feature.
 
 Preliminary Infraworks 360 Model Builder Data
 
I also had a preliminary site plan of the proposed development in .PDF format found on the internet (http://www.mspsinc.com/park-plaza-shops).
 
Park Plaza Shops (Main Street Property Services, Inc).
 
Converting the .PDF to an image file was not difficult to do.  Attempting to use the image as a data source is where I ran into the first issue.  Without a world file, attempting to use the image as a Raster data source in Infraworks 360 produced a quick (and very limited) error that simply said “Failed to Import Data.”  Not a lot of information is given there, but the reason is that the “Raster” data sources are organized into rows and columns that contain values (data) representing information associated with those cells.  Without the data, the plain image file did not meet the requirements of being a “Raster” image source.

In order to fix this, I needed to create the data that went along with the image, and for that I used Autodesk AutoCAD Civil 3D with Raster Design.
Because I had limited information on the project itself outside of the address, I started out with a blank Civil 3D drawing and an assigned coordinate system.  From there I used the Geolocation feature to download an aerial image of the project site in my drawing.  This gave me a geolocated visual reference of where the sketched image needed to be.
 
Autodesk AutoCAD Civil 3D Geolocation Aerial Image.
 
Once I had the aerial image in Civil 3D, it was relatively easy to insert the image, scale and rotate it into place using the ALIGN command.  One thing to note here is that it is an approximate location based on visual references.  Since my intent was to use this as part of a preliminary model in Infraworks 360, this level of accuracy was acceptable for that purpose.
 
Autodesk AutoCAD Civil 3D Drawing with Overlaid Tiff Image.
 
Now that everything was in place, all that was left was to export the Raster data from Civil 3D.  Using the ISAVEAS and IWORLDLOUT commands allowed me to save a new image and export the associated world file for that image containing the coordinate data provided by Civil 3D (this came from the coordinate system that was assigned to the drawing file).  These two files now provide the necessary data for the image to be used as a Raster data source in Infraworks 360.

Image (.TIF) and World (.TFW) Files Exported from Autodesk AutoCAD Civil 3D

Back in Infraworks 360, I went through the same process of importing Raster data, and this time everything went as expected.  After configuring the data source to assign the proper coordinate system, the image appeared as Ground Imagery in the model.

 Infraworks 360 Model with Custom Ground Imagery.
 
...And with another few minutes in Infraworks 360, I added some 3D features for more visual impact...
  
Infraworks 360 3D Site Plan
 
Using Infraworks 360 and Autodesk AutoCAD Civil 3D, I went from a 2D Site Plan to a 3D conceptual model in just a matter of minutes.  Next time you’re looking for something to take your proposals to the next dimension (2D to 3D!), consider Infraworks 360.

For more information on training and consulting for the various products Ideate services, visit our website at www.ideateinc.com


Ideate ENI Manager & Senior Application Specialist

Matt is an ENI Manager and Senior Application Specialist in Ideate, Inc.’s Seattle office. He has a B.S. in Mechanical Engineering and is a licensed Civil Engineer. Prior to joining Ideate, Matt worked as a civil engineer, using Civil 3D on a variety of projects including site development, roadway improvements and infrastructure design. With over 10 years of experience in the civil engineering industry, Matt now provides training, consulting, technical support, and implementation strategies for organizations transitioning to Civil 3D. Matt is an Autodesk Certified Instructor (ACI), as well as an Autodesk Certified BIM Specialist: Roads and Highway Solutions. Additionally, Matt is and Autodesk Certified Professional for AutoCAD, and AutoCAD Civil 3D. He can be found on twitter as @MattM_PE


Get it. Know it. Use it.
 

September 3, 2015

Webcast - Better Together: Connecting the Supply Chain


The reduction of waste during fabrication and in the field can have measurable effects on project budget, while more collaborative processes in the supply chain can have a measurable effect on project schedule. General contractors can more effectively plan and build their concrete projects by bringing other concrete suppliers into the BIM workflow. This webinar will discuss how BIM-centric workflows for cast-in-place concrete can improve designs and reduce waste. We'll discuss these benefits in the following areas:


• Lift drawings and pour quantities
• Multi-trade coordination
• Planning of concrete work using field point layout
• Track supply chain information
• Documenting field conditions


Date: Thursday September 10, 2015
Time: From 8:00 am to 9:00 am (Pacific Standard Time)


For more information on training and consulting for the various products Ideate services, visit our website at www.ideateinc.com

August 31, 2015

Classroom Training - Open AutoCAD, Revit and Navisworks Classes

Know It. Ideate Training.

Position yourself to land dream projects. Tap the full potential of your software solutions. Increase your facility, fluidity and capability to maximize the value of your precision software tools.
9.10-9.11::San Francisco
Navisworks Fundamentals
9.15-9.17::Portland
Revit Architecture Fundamentals
9.15-9.17::Seattle
Revit Architecture Fundamentals
9.21-9.22::San Francisco
Revit MEP - Mechanical Fundamentals
9.22-9.24::Seattle
AutoCAD Fundamentals
9.29-10.1:San Jose
Civil 3D Fundamentals
Know your software. Sign up now! 

Contact the Ideate Training Department at 888.662.7238 x1012 or education@ideateinc.com

June 22, 2015

Classroom Training - Open AutoCAD and Civil 3D Classes

Know It. Ideate Training.

Position yourself to land dream projects. Tap the full potential of your software solutions. Increase your facility, fluidity and capability to maximize the value of your precision software tools.
6.29::Portland
Revit Architecture Families
6.29-6.30::San Jose
AutoCAD Beyond the Basics
6.30::San Francisco
Revit Architecture Families
7.7-7.9::San Jose
Revit Architecture Fundamentals
7.7-7.9::Seattle
Civil 3D Fundamentals
Know your software. Sign up now!

June 8, 2015

eLearning - Upcoming Revit, Infrastructure, and Ideate Software Classes

Join the Ideate Tech Experts for eLearning – live online classes that provide your entire organization with easy access to premium education.
6.10::Infrastructure 201:
Working With ReCap
6.11::Ideate Software:
Revit Project Management with Ideate BIMLink
6.12::Revit 201:
Revit Import Into 3ds Max Design
6.18::Ideate Software:
Ideate BIMLink for Revit MEP Projects
6.19::Revit 201:
Documenting Your Project in Revit MEP: Keynotes and General Notes
6.23::Revit 201:
Scheduling 201
6.25::Ideate Software:
Introduction to Ideate Sticky
Each class is designed to give you specific, improved results in a particular topic. You can interact with the instructor right from your own office, while eliminating travel time. Because the class schedule rotates, you can easily select your topics of interest and choose the day which best meets your schedule.

Click here for class descriptions, times and registration link. Questions? Contact education@ideateinc.com

Get It. Know It. Use It.

March 25, 2015

Solar Analysis (Insolation) on Revit Building Elements Such as Roofs and Walls

Using the example of a historic building, in a few minutes, the Revit Solar Analysis add-in, will let you display color coded ranges of insolation values. Since the software takes into account adjacent buildings or planting, you can use this to establish optimum location for solar panels.

The add-in is available from Autodesk Labs
 

The add-in runs in Revit 2014 and 2015. It is located under the Analyze tab. 


All settings are in one simple dialog box.


Output is customizable and can be in the form of analysis overlays on the model or values can be output to a CSV file (Spreadsheet).


Jim Cowan
Ideate AEC Senior Application Specialist

Jim Cowan’s extensive AEC design industry experience, Autodesk design solutions expertise and status as an Autodesk Certified Instructor have made him a sought after university curriculum developer, instructor and presenter. Jim’s areas of expertise include eLearning, interoperability between solutions and overcoming barriers to the adoption of Building Information Modeling (BIM). Educated in Architecture at Edinburgh College of Art/Heriot–Watt University and in Landscape Architecture at University of Manitoba, Jim has special focus on sustainability issues: daylight analysis, sun studies, lighting analysis, modeling buildings and conceptual energy modeling (models with shading devices). YouTube Channel: MrJimCowan

Get it. Know it. Use it.

March 19, 2015

Ideate, Inc. Named Autodesk Reseller of the Year

SAN FRANCISCO, California, 3/19/2015 - Ideate, Inc., an Autodesk, Inc. Platinum Value Added Reseller, today announced that 3D design, engineering and entertainment software industry leader, Autodesk, Inc., has named Ideate, Inc. its North American Reseller of the Year for FY15 at the Autodesk One Team Conference, an annual sales and leadership event held this month in Las Vegas, NV, that brings together Autodesk employees and partners from around the world. This is the top honor awarded annually to an Autodesk partner and recognizes Ideate, Inc. for its outstanding achievements in delivering world-class service and technical expertise to customers throughout fiscal year 2015, exceeding expectations in sales, growth and other key measures.

 “It is rewarding and gratifying to be acknowledged as Autodesk Reseller of the Year.” said Bob Palioca, President of Ideate, Inc. “This honor exemplifies our obligation to overwhelmingly delight our customers and our commitment to our communities’ success.” 

"The award celebrates Ideate’s outstanding performance and Autodesk expertise,” said Steve Blum, senior vice president of Worldwide Sales and Services, Autodesk. “Ideate consistently shows leadership as an Autodesk partner and creates innovative solutions that help make customers more efficient, competitive and innovative.”

Autodesk’s global channel partner network includes more than 2,000 partners, all of whom support customers across a number of industries, such as architecture, engineering and construction; manufacturing; automotive; utilities and government; telecommunications; games; television and film. 

About Ideate, Inc. 
Ideate, Inc. is a leading Autodesk Authorized Developer with 25+ years’ experience in software development and specific focus on Building Information Modeling (BIM). As an Autodesk solutions provider, Ideate has offered quality software, training, support and custom consulting services to the architectural, engineering and construction (AEC) industries since 1992. Headquartered in San Francisco, California and operating Autodesk Authorized Training Centers (ATCs) in California, Oregon and Washington, Ideate is recognized as an Autodesk Platinum Partner for Architecture, Engineering and Construction, Autodesk’s highest level of authorization. 

Autodesk and the Autodesk logo are registered trademarks of Autodesk, Inc. and/or its subsidiaries and/or affiliates, in the USA and/or other countries. All other brand names, product names, or trademarks belong to their respective holders.

March 16, 2015

Classroom Training - Open Revit Architecture and AutoCAD Civil 3D Classes

Know It. Ideate Training.

Position yourself to land dream projects. Tap the full potential of your software solutions. Increase your facility, fluidity and capability to maximize the value of your precision software tools.
3.24-3.26::Seattle
Civil 3D Fundamentals
4.7-4.9::Seattle
Revit Architecture Fundamentals
4.7-4.9::San Jose
Revit Architecture Fundamentals
4.21-4.23::San Francisco
Revit Architecture Fundamentals
4.28-4.30::San Francisco
Revit Architecture Beyond the Basics
Know your software. Sign up now!

March 9, 2015

Classroom Training - Open Revit and AutoCAD Civil 3D Classes

Know It. Ideate Training.

Position yourself to land dream projects. Tap the full potential of your software solutions. Increase your facility, fluidity and capability to maximize the value of your precision software tools.
3.17-3.19::Portland
Revit Architecture Fundamentals
3.17-3.19::Sacramento
Civil 3D Fundamentals
3.24-3.26::Seattle
Civil 3D Fundamentals
3.24-3.26::San Francisco
Revit Architecture Fundamentals
3.31-4.1::San Jose
Revit MEP Electrical Fundamentals
Know your software. Sign up now!

March 2, 2015

Classroom Training - Open Revit MEP, Revit Architecture, and AutoCAD Civil3D Classes

Know It. Ideate Training.

Position yourself to land dream projects. Tap the full potential of your software solutions. Increase your facility, fluidity and capability to maximize the value of your precision software tools.
3.17-3.19::Portland
Revit Architecture Fundamentals
3.17-3.19::Sacramento
Civil 3D Fundamentals
3.24-3.26::Seattle
Civil 3D Fundamentals
3.24-3.26::San Francisco
Revit Architecture Fundamentals
3.31-4.1::San Jose
Revit MEP Electrical Fundamentals
Know your software. Sign up now!

December 23, 2014

Hidden feature of InfraWorks: How to Create a Non-symmetrical Roadway Section

If you have been using InfraWorks for a while you would know that most roadway styles that come shipped with the software are for symmetrical roadway. There is not enough documentation on how to create a non-symmetric section and it is unintuitive. In this blog post I expose a little trick and this hidden feature.

So here a screen shot of the typical symmetric roadway section.


You want to go from the above to the following – No Passing zone…


Or a bike lane…


Now that I have your attention – here is how you achieve this:

In the Style Edit dialog box the Track Settings frame highlighted in red…


…has a few buttons at the bottom to edit/modify the roadway section. What is apparent is that if you select a row in the Right Group or Median Group and use the above mentioned buttons you can modify section. For example, add/modify lane/sidewalk width, etc.

Here is the important part – what is not apparent is that if you click on the row Right Group, not a row within the Right Group, you end up selecting the whole Right Group and then if you use the last button highlighted in red below…


…you get the Left Group…


Now you can modify this Left Group to create a section per project requirements. In the interest of time and simplicity I completed the left group as shown below. You can see the it has a bike lane.


And that’s it!

Now if you have not customized styles in InfraWorks look for my blog post about how create/modify styles in InfraWorks.


Gaurav Bagga
Ideate Infrastructure Solutions Application Specialist

Gaurav is a well rounded Application Engineer and Project Manager for Infrastructure Solutions at Ideate based out of San Francisco. He has over 15 years experience in construction industry and has been helping numerous small, medium and ENR 500 firms maximize their CAD investment for the last ten years. Gaurav is an Autodesk Certified Instructor and Autodesk Civil 3D Implementation Certified Expert. He has taught at several conferences, CAD Camps and Autodesk University. He has taught AutoCAD, Civil 3D, Land Desktop and Map 3D to thousands of students and helps Ideate develop the Infrastructure Services curriculum and courses. With his extensive CAD technology background he helps Bay Area engineering and surveying firms analyze and improve their design and drawing production process thereby improving productivity and the bottom line. Follow Gaurav on Twitter: @BeGeez

Get it. Know it. Use it.

December 4, 2014

Using Filters to Hatch Cable Tray in Revit MEP

Display Filters & View Templates

In many system drawings there is a need to differentiate between different types of Cable Tray elements in coordination and dedicated electrical drawings.
Standard display of the Cable Tray using fine settings from the Electrical-Default template
In traditional CAD this was achieved by using different Layers and although we have similar methodologies in Revit via the System Styles where we can set colors and patterns by category there is often a need to show certain items, like cable tray differently, even though they may be of the same category.

The main reason for this paper is that I was asked today by one of my students, "What is the easiest way to hatch cable tray in Revit MEP to indicate the different types of cable tray that has been installed on a project." There are several ways this could be accomplished. You could simply use the Filled Region to manually hatch the cable tray. While this is the most simple, it is tedious and time consuming.

Method 2 would be to use Phases inside of Revit MEP. You could set up some phases and change the graphics of the phases to indicate the hatching. This is easy enough, but almost an over kill.

The method I ended up recommending is to just use View Filters. You can simply create a new filter and change the graphics of the filter to have the hatch pattern.

To this end I created a short video to share with my students and thought it might be helpful for others. Watch the video Here
.

For more information visit our website at www.ideateinc.com


Bill Johnson
Ideate Senior Application Specialist MEP/AEC Solutions

Bill has over 25 years experience in applying MEP & AEC design solutions for large commercial companies, this has led to actively develop Autodesk® Revit® implementation strategies, techniques, and procedures for architectural and MEP companies. He has worked for TEECOM Design Group, GTE/GTEL, Greg LeDoux and Associates, and Scottish Power in England. Bill is a Autodesk MEP Implementation Certified Expert, and has been the Lead Designer for several multimillion dollar communication sites which have included structural, electrical, HVAC, conduit, cable plans and equipment layouts. He graduated from the Pasadena Institute of Technology and has a Sustainable Design Certification from the University of California at Berkeley.

Get it. Know it. Use it.

September 18, 2014

InfraWorks 2015: Import Sketchup Model

Last year I wrote a blog post on how to import a Sketchup model into InfraWorks. This post is essentially an update to that post. With the current release of InfraWorks the process has been simplified to just a drag and drop of a SKP file, which you can download from Sketchup 3D model warehouse. Here is a result:


However, as you drag & drop your SKP file I have noticed it will not bring the materials and textures associated with it, see below:


So the trick is to convert the SKP file to Collada, DAE, format by simply exporting SKP from the free Sketchup Make 2014 to get the following result:


So download and install Sketchup per the link above the export:


As you export to DAE it creates a folder with all associated material images.

Simply drag and drop the DAE file inside your InfraWorks model, assign it the right Type and place it interactively using your mouse. Click Close & Refresh.


You are done. Enjoy!


Gaurav Bagga
Ideate Senior Application Specialist,
Infrastructure Solutions

Gaurav is a Senior Application Specialist for Infrastructure Solutions at Ideate based out of San Francisco. He has over 18 years of experience in construction and related software industry. With this extensive design technology background he helps engineering and surveying companies, federal and state government agencies, and ENR 500 firms critically analyze and improve their construction drawing production process. He implements Civil infrastructure design technology led by InfraWorks and Civil 3D and has helped Ideate grow Civil Infrastructure Services. Being an industry recognized speaker he has presented cutting edge design technology at several industry conferences such as Autodesk University. Follow Gaurav on Twitter: @BeGeez

Get it. Know it. Use it.

September 16, 2014

Lines Display Blurry or Unsharp in AutoCAD 2015

While working on Ideate Tech support, a client had an issue with lines showing up blurry in AutoCAD 2015. This turns out to be a known issue that Autodesk is looking into. There are some work-arounds, however. 

The solution

It is most likely related to your graphics card driver.  Below is a list of possible fixes:

Option 1

  1. Turn Smooth line display off in the Graphics Performance Box
Option 2
  1. Edit special settings of the NVidia driver, “NVidia FXAA Anti-Aliasing” = OFF. You can find the NVidia control panel by right clicking anywhere on your desk top and choosing the NVidia Control panel.  Once in there, go to the Manage 3D settings, and choose AutoCAD on the Program Settings tab.  From there, you can make sure Antialiasing – FXAA is turned off.  Refer to the image below. 
  2. Turn Hardware Acceleration on in AutoCAD
Option 3
  1. Uninstall AutoCAD 2015 
  2. Update your Graphics card Driver
  3. Re-install AutoCAD 2015
Here is a link to the documented solution from Autodesk.

For more information on Autodesk products, continue to check out our blog.  Additionally, visit our website for information on training and consulting for the various products Ideate services, visit our website at www.ideateinc.com.


Kate Ming, P.E.
Ideate AEC Application Specialist


Kate is a California licensed civil engineer with a BS in Civil and Environmental Engineering from UC Berkeley. Prior to Ideate, she worked at a multinational company for four years doing general civil design on large infrastructure projects. She is versed in roadway, rail, utility design and site development. She also has experience with utility demand analysis and Low Impact Development plans. As a Civil 3D Autodesk Certified Professional Kate provides training and support for Civil 3D, AutoCAD, and InfraWorks.


September 15, 2014

Classroom Training - Open Revit Architecture an Revit MEP Classes

Know It. Ideate Training.

Position yourself to land dream projects. Tap the full potential of your software solutions. Increase your facility, fluidity and capability to maximize the value of your precision software tools.
9.17-18::Seattle
Revit MEP Electrical Fundamentals
9.22-24::San Francisco
Revit Architecture Fundamentals
9.23-25::Portland
Revit Architecture Fundamentals
9.30-10.2::Sacramento
Revit Architecture Fundamentals
9.30-10.3::San Francisco
Revit MEP Piping & Plumbing Fundamentals
Know your software. Sign up now!